Cards
Add credit cards, set their billing cycle, and follow card spending.
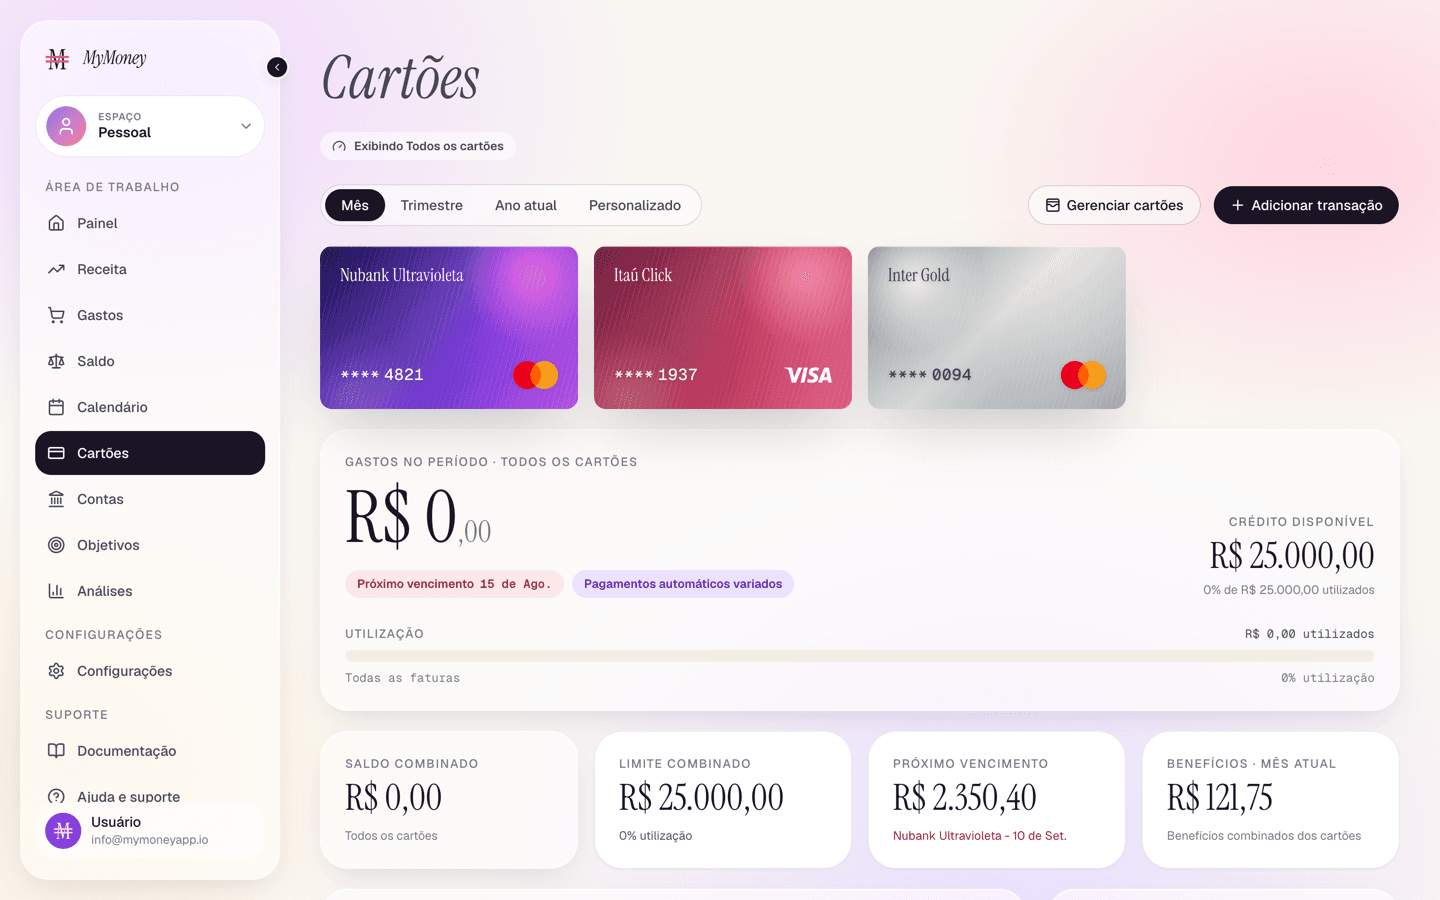
The Cards page tracks your credit cards: what you've charged, how much of the limit is used, and when the next bill is due.
Adding a card
- Click Manage cards, then Add card.
- Fill in:
- Nickname (e.g. "Nubank Ultravioleta") and the last 4 digits;
- Network (Visa, Mastercard, Amex, Discover) and credit limit;
- Card color — the card face preview updates live;
- Payment due day — the day of the month your bill is due (repeats monthly);
- Statement closing — how many days before the due day the statement closes;
- Auto debit — turn on if your bank pays the bill automatically, and choose which account it's paid from.
- Save. When editing an existing card, changes save automatically as you leave each field.
Setting the due day is what activates monthly bill tracking for the card — see Credit card statements and bills.
Reading the page
- Card rail — a visual face for each card. Click one or more cards to focus the page on them (see below).
- Statement pill — under the period total:
- with all cards shown, it reads "Next due" with the soonest due date across your cards;
- with one card selected, it shows that card's own due date — and when the card has an open bill, the live amount too. From the due day it turns red ("Payment due"). Click it to open the pay-bill modal.
- KPI row — combined limit used (with the utilization %), combined limit and how much credit is still available, next due, rewards. The limit used is what your cards still owe right now, so it does not move with the period filter — a settled statement frees the limit back up and the figure drops.
- Charts — a 6-month spending trend and a category donut for the selected period.
- Transactions table — every card charge; click a row to edit it.
Viewing one or several cards
By default the page adds every card together — the chip under the title reads "Showing all cards". Selecting cards narrows the whole page (the statement card, KPIs, trend, category donut, and the transactions table) to just those, which is how you check a single statement or compare two cards without the others in the way.
Select a single card
Click a card face in the rail. It gets a ring and a check mark, the other faces dim, and the chip under the title shows that card's name and last 4 digits.
This is the view to use for one card's bill: the statement card switches to that card's own due date, its closing date, and — when the card has an open bill — the live bill amount, which you can click to pay. The KPIs change from combined figures to "Card limit used" and "Card limit" for that card alone.
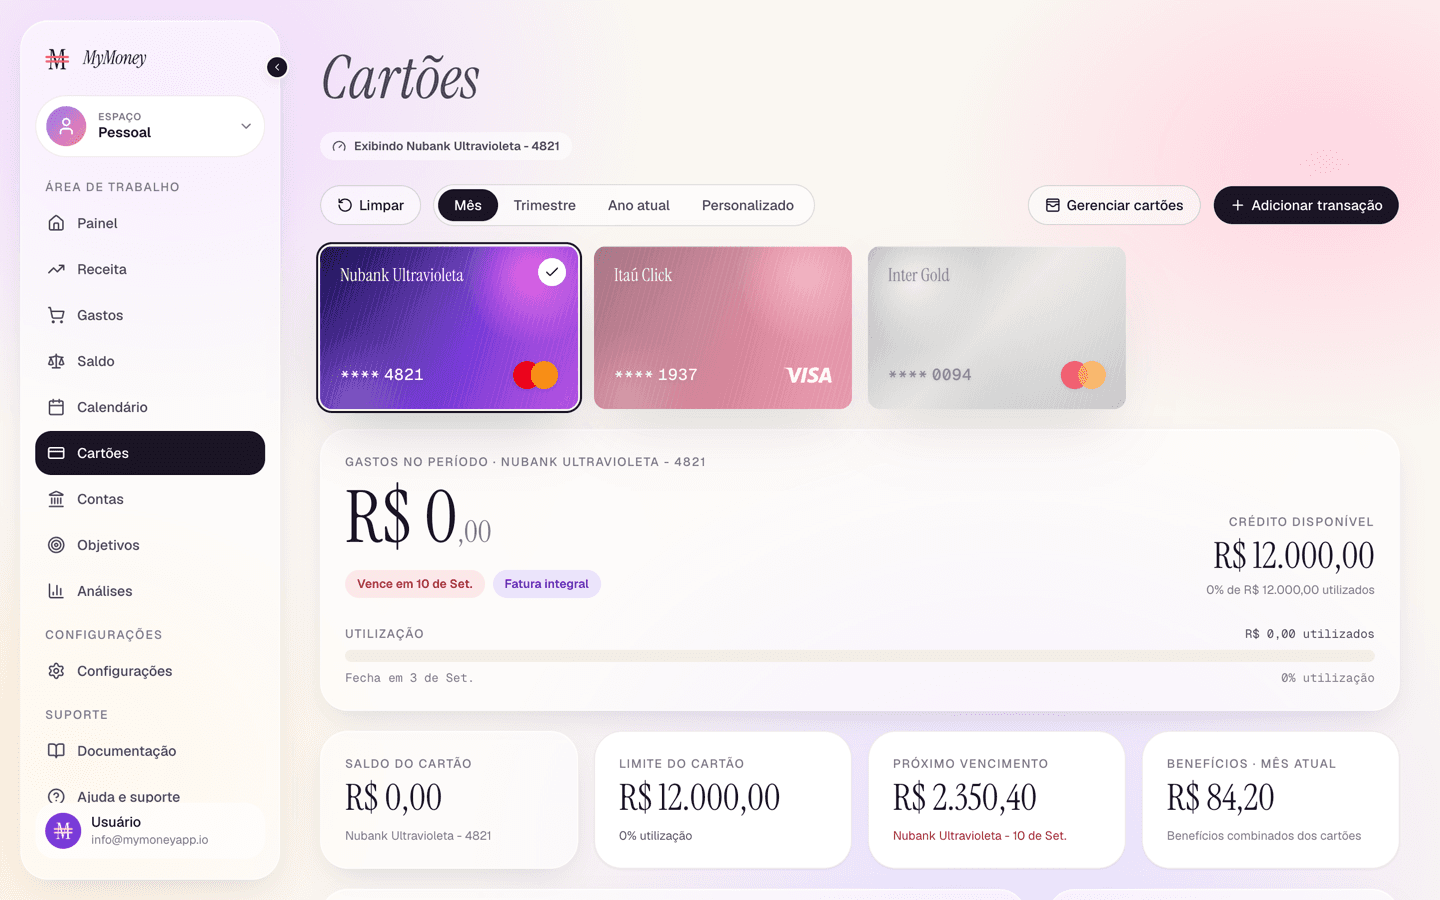
Select several cards
Click a second card face (and a third, and so on) to add it to the selection. Each selected face keeps its check mark, the chip counts them — "Showing 2 cards" — and the totals become the sum of just those cards. The statement pill goes back to "Next due" with the soonest date among them.
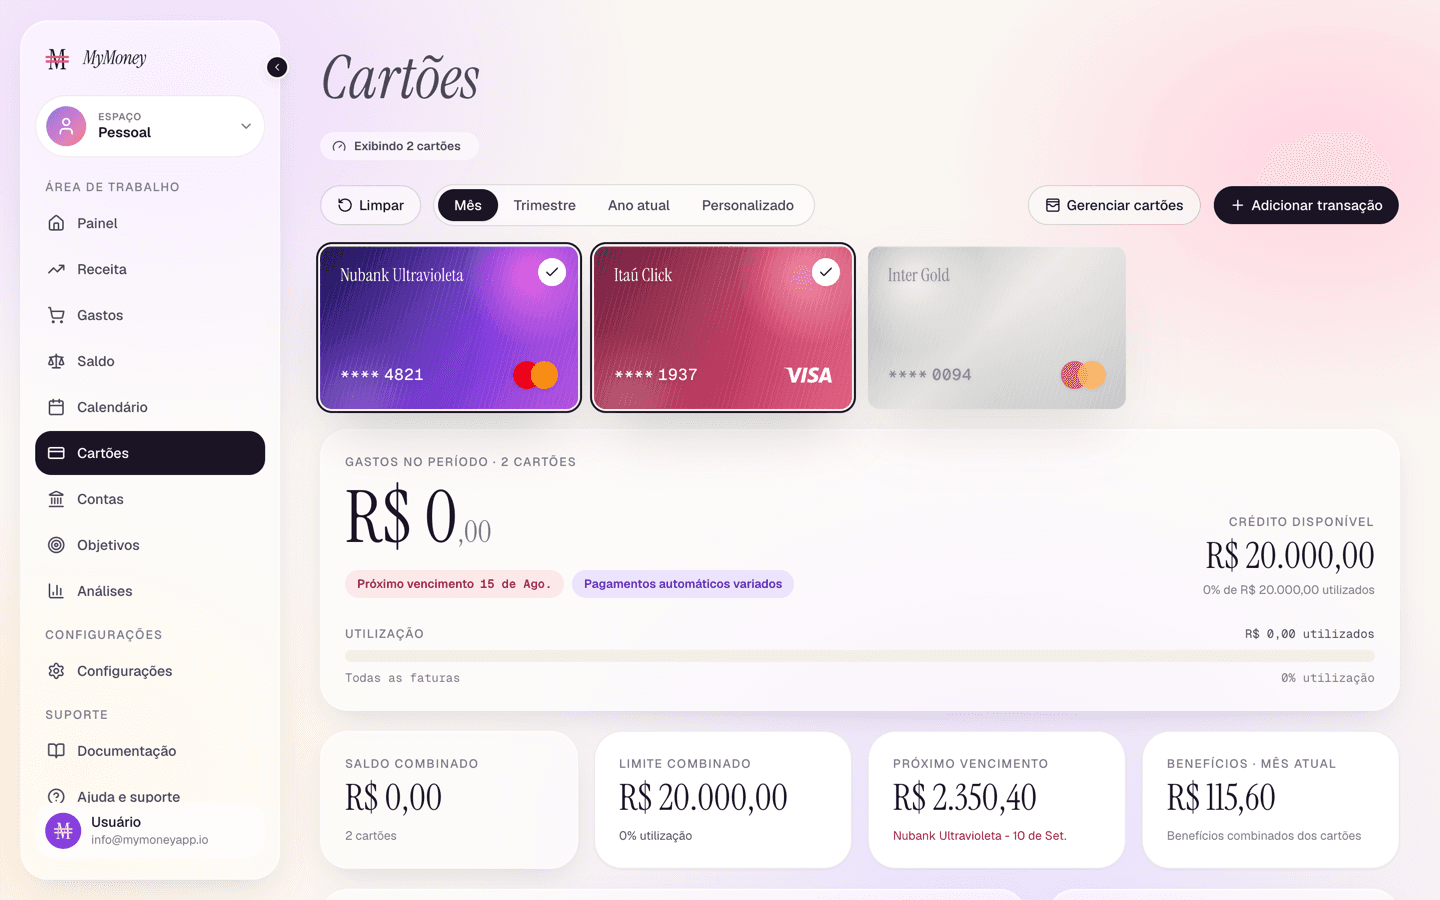
Clear the selection
- Click a selected card face again to remove that one card.
- Or click Reset, which appears to the left of the period filter as soon as anything is selected, to go back to all cards at once.
Like the period filter, the selection lives in the page address, so a scoped view can be bookmarked or shared and it opens the same way next time.
Charging an expense to a card
Use the Add transaction button in the top-right corner of this page (or any Add button elsewhere) and pick the card by name as the payment method. Details in Adding and editing transactions.